Homemade Marshmallows Recipe: A Simple Guide to Fluffy Perfection
Here on the farm, we adore marshmallows! They’re one of those delightful treats that I always keep in the pantry. In our ingredient only household, which leans toward simple living and non-processed foods, when the kids are craving something sweet and I haven’t baked anything, the usual options are limited to chocolate chips and a bag of marshmallows.
This post contains affiliate links, which means I make a small commission at no extra cost to you. See my full disclosure here
As part of my journey to create more homemade versions of store-bought items, I’ve decided it’s time for marshmallows to make their debut in our kitchen. A marshmallows recipe can replace those cute little mini marshmallows in our pantry. I’ve discovered a perfect recipe for making simple marshmallows at home using ingredients I can control.
These ingredients are often readily available in our kitchen, allowing us to whip up beautiful, fluffy, and delicious marshmallows with ease. While the kids might not be able to raid the pantry as freely anymore, I can make enough marshmallows to have on hand for special occasions.
These marshmallows are absolutely delicious! Making marshmallows at home can seem daunting and a bit confusing at first. However, with the right approach, you’ll find that it’s an enjoyable and rewarding process. It’s worth noting that making marshmallows is quite scientific; you can’t simply throw ingredients together and expect a good outcome. To achieve beautiful, fluffy marshmallows perfect for your holiday baking, it’s crucial to follow the instructions carefully and step-by-step. An expert marshmallows recipe will ensure success.

I plan to make these delightful treats quite a bit over the next few months for various holiday recipes. When I cook, I love to be inspired and experiment in the kitchen; however, baking, particularly with marshmallows, requires precision. Try using this marshmallows recipe to ensure that your sugar is cooked to the right temperature, and the correct amounts of ingredients are measured accurately. Substitutions can lead to disappointment, so it’s best to stick with the ingredients listed below for optimal results.
Ingredients:
- 2 cups + 1 tbsp white sugar
- ¼ cup maple syrup
- ½ cup water (for blooming the gelatin)
- 7 tsp gelatin
- 1½ tsp pure vanilla extract
- 1 cup confectioner’s sugar (sifted, for dusting)
Equipment Needed:
- An 8×8 inch baking dish (I prefer using a cast iron pan, greased with butter or coconut oil)
- Electric mixer (a KitchenAid is ideal, click on the link for a similar model.)
- Candy thermometer (an electric probe thermometer works well)
- Spatulas (silicone spatulas are great for scraping)
- Baking parchment (optional, but can help with cleanup)
Instructions:
- Prepare Your Baking Dish: Grease your baking dish with butter or coconut oil and dust it with sifted confectioner’s sugar to prevent sticking.
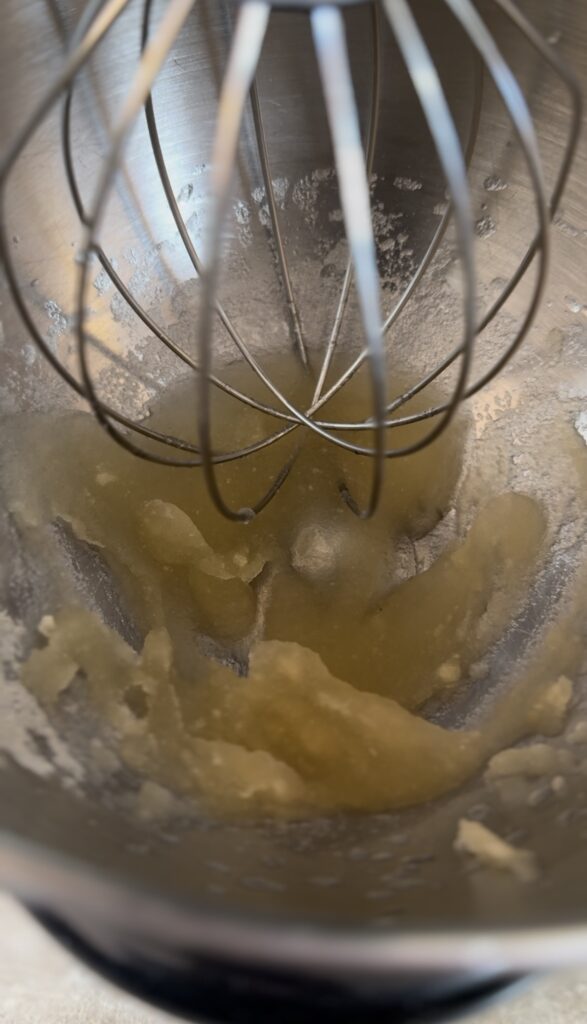
- Bloom the Gelatin: In your mixer bowl, mix ½ cup of water with the 7 tsp of gelatin. Stir gently and let it sit for about 5-10 minutes until it becomes thick and spongy.
- Cook the Sugar Mixture: While your gelatin blooms, in a saucepan, combine the 2 cups + 1 tbsp of white sugar, ¼ cup of maple syrup, ½ cup of water. Heat over medium, stirring until the sugar dissolves. Once dissolved, stop stirring and place the lid on the pot for 5 mins. Allowing the steam to dissolve any sugar crystals on the pot sides. Remove the lid and allow it to boil until it reaches 240°F (115°C) on your candy thermometer.
- Combine Gelatin and Syrup Mixture: Remove the saucepan from the heat and pour into your mixer on medium speed. Allow the mixer to pour down the inside of the bowl to slightly cool before it hits the gelatin.
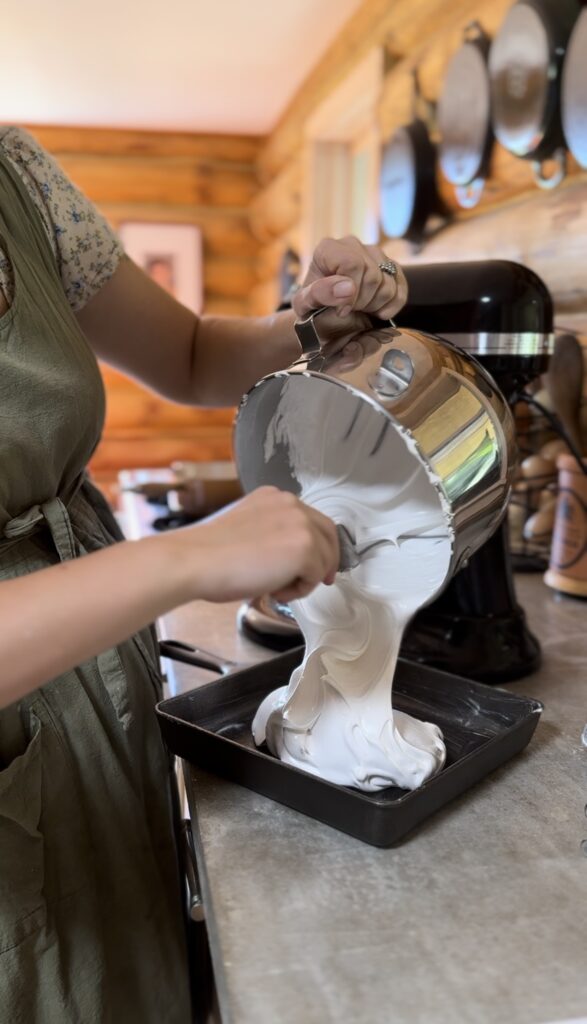
- Whip the Mixture: Using your electric mixer on high, whip the mixture for about 10 minutes, until it’s thick, fluffy, and holds stiff peaks. Be sure to mix right after cooking; don’t let the mixture cool down, or your marshmallows will lose their bounce! Add the vanilla and mix for another min.
- Set the Marshmallows: Pour the marshmallow mixture into your prepared baking dish, smoothing the top with a spatula. Dust the top with sifted confectioner’s sugar to keep a crust from forming.
- Let Them Set: Allow the marshmallows to sit at room temperature covered with a tea towel for at least 4 hours, or ideally overnight, until they are firm.
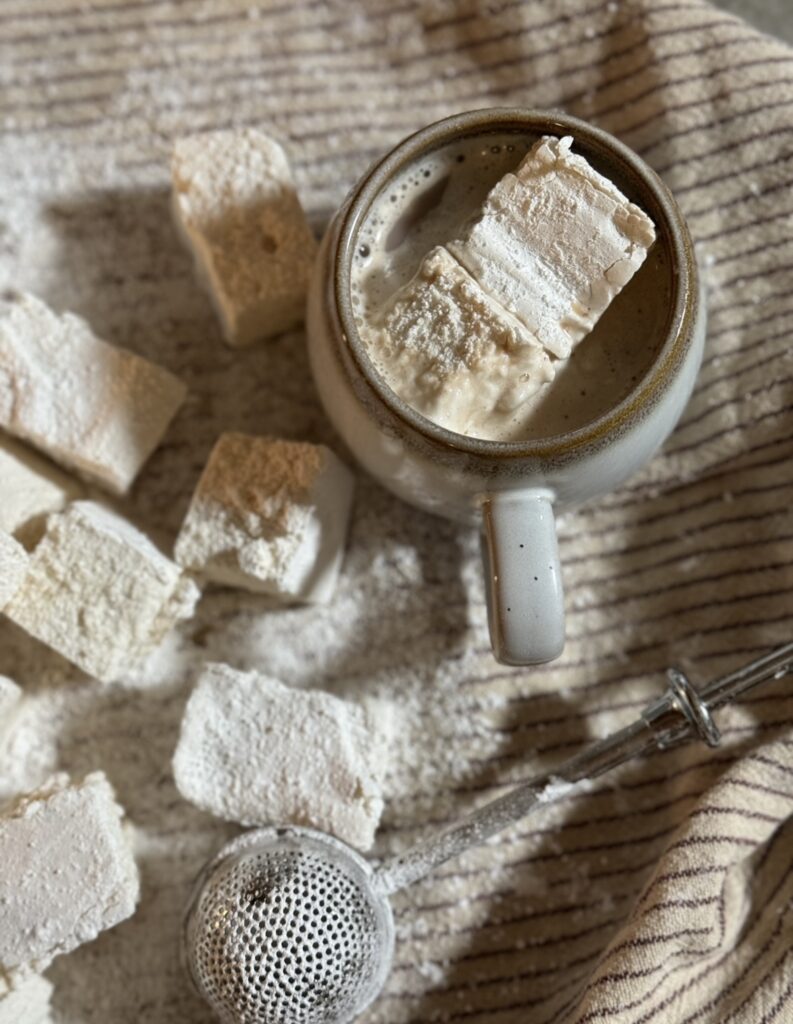
- Cut and Dust: Once set, dust a clean surface with more confectioner’s sugar and carefully remove the marshmallow block from the dish. Cut into squares using a greased knife and toss the marshmallow pieces in more powdered sugar to coat.
- Storage: Once cut, you can store your marshmallows in a sealed glass jar dusted or ziplock bag dusted with confectioner’s sugar, keeping them fresh for your holiday treats.

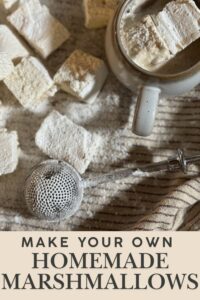
These homemade marshmallows are perfect for topping a warm cup of hot chocolate and will certainly delight your family and friends. Don’t be afraid to try making marshmallows; once you understand the steps and follow them closely, you’ll find they’re surprisingly easy to make and absolutely delicious! Enjoy your marshmallow-making adventure with this marshmallows recipe!
Homemade Marshmallows: A Simple Guide to Fluffy Perfection
Ingredients
- 2 cups + 1 tbsp white sugar
- ¼ cup maple syrup
- ½ cup water for blooming the gelatin
- 7 tsp gelatin
- 1½ tsp pure vanilla extract
- 1 cup confectioner’s sugar sifted, for dusting
Instructions
- Prepare Your Baking Dish: Grease your baking dish with butter or coconut oil and dust it with sifted confectioner’s sugar to prevent sticking.
- Bloom the Gelatin: In your mixer bowl, mix ½ cup of water with the 7 tsp of gelatin. Stir gently and let it sit for about 5-10 minutes until it becomes thick and spongy.
- Cook the Sugar Mixture: While your gelatin blooms, in a saucepan, combine the 2 cups + 1 tbsp of white sugar, ¼ cup of maple syrup, ½ cup of water. Heat over medium, stirring until the sugar dissolves. Once dissolved, stop stirring and place the lid on the pot for 5 mins. Allowing the steam to dissolve any sugar crystals on the pot sides. Remove the lid and allow it to boil until it reaches 240°F (115°C) on your candy thermometer.
- Combine Gelatin and Syrup Mixture: Remove the saucepan from the heat and pour into your mixer on medium speed. Allow the mixer to pour down the inside of the bowl to slightly cool before it hits the gelatin.
- Whip the Mixture: Using your electric mixer on high, whip the mixture for about 10 minutes, until it’s thick, fluffy, and holds stiff peaks. Be sure to mix right after cooking; don’t let the mixture cool down, or your marshmallows will lose their bounce! Add the vanilla and mix for another min.
- Set the Marshmallows: Pour the marshmallow mixture into your prepared baking dish, smoothing the top with a spatula. Dust the top with sifted confectioner’s sugar to keep a crust from forming.
- Let Them Set: Allow the marshmallows to sit at room temperature covered with a tea towel for at least 4 hours, or ideally overnight, until they are firm.
- Cut and Dust: Once set, dust a clean surface with more confectioner’s sugar and carefully remove the marshmallow block from the dish. Cut into squares using a greased knife and toss the marshmallow pieces in more powdered sugar to coat.
- Storage: Once cut, you can store your marshmallows in a sealed glass jar dusted or ziplock bag dusted with confectioner’s sugar, keeping them fresh for your holiday treats.


LOVED making this recipe. I don’t think I will go back to storebought….ever! Thank you for sharing!