The Ultimate Soft Sourdough Sandwich Bread
Why I bake sandwich bread?
When it comes to bread, many of us are often left wondering what’s really in those loaves we find on supermarket shelves. I frequently remind my friends that the soft sourdough sandwich bread they consume is often not true bread at all. In fact, the FDA has reclassified various bread products, which can be disheartening for anyone who appreciates the real deal.
I was born in England, where bread is made with authenticity and care, I find it hard to accept that cake batter mixes, laden with preservatives, are labeled as bread. For those seeking authenticity, soft sourdough sandwich bread is an excellent choice.
In England, we cherish fresh bread that doesn’t last more than a few days—so much so that buying bread is part of our daily routine. The aroma of freshly baked bread is something to be savored, not overshadowed by the artificial smells of preservatives as bread ages.
This love for real bread inspired me to embark on my own baking adventure, particularly with sourdough, which has become a staple in my home. My favorite recipe is the soft sourdough sandwich bread.
My family consumes around four loaves of sandwich bread each week, along with a delightful sourdough for dinner. I typically dedicate one day a week to baking my sandwich bread, keeping two loaves on the counter for immediate use and popping two in the freezer for later.
This method not only ensures that we always have soft bread on hand, but it also allows me to control the ingredients and flavor of the soft sourdough sandwich bread we enjoy.
Why sourdough?
Sourdough bread is not only flavorful but also healthier than many commercial options. The fermentation process breaks down gluten and increases the availability of nutrients, making it easier to digest. Plus, it has that delightful tang that elevates any meal.
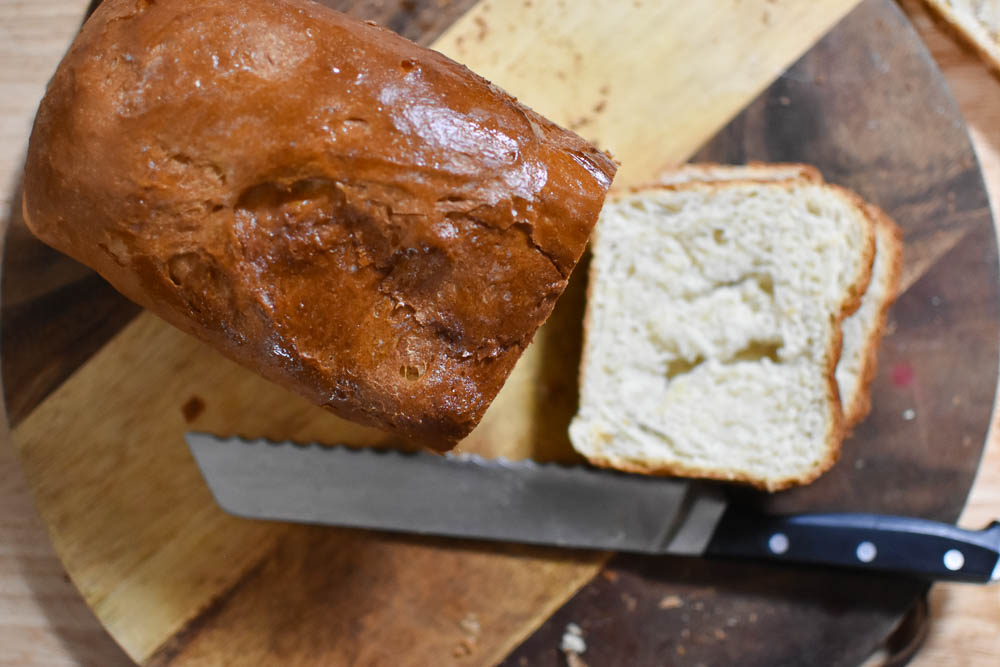
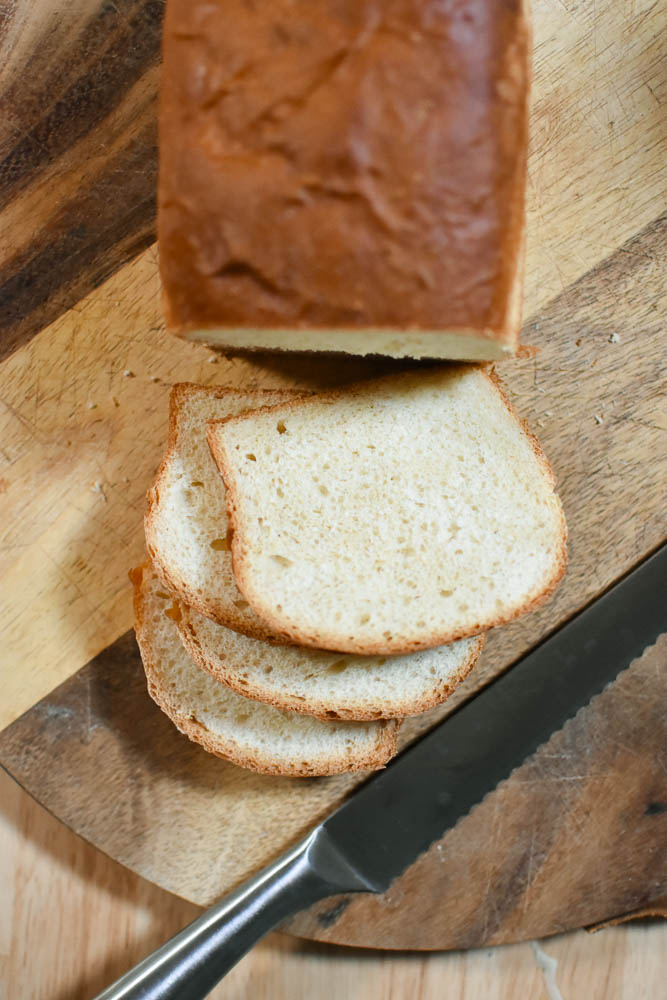
This recipe is perfect for families, as it yields a loaf that is soft enough for sandwiches yet sturdy enough to hold up to spreads and fillings. For anyone looking to enjoy a homemade loaf, soft sourdough sandwich bread is ideal.
Today, I’m excited to share my tried-and-true recipe for soft sourdough sandwich bread—a loaf that’s perfect for sandwiches, toast, or simply enjoying with a bit of butter. This recipe has consistently delivered a soft, beautiful loaf that my kids adore, and I believe you and your family will love it just as much!

This post contains affiliate links, which means I make a small commission at no extra cost to you. See my full disclosure here
Grab my lodge bread tins here
Ingredients
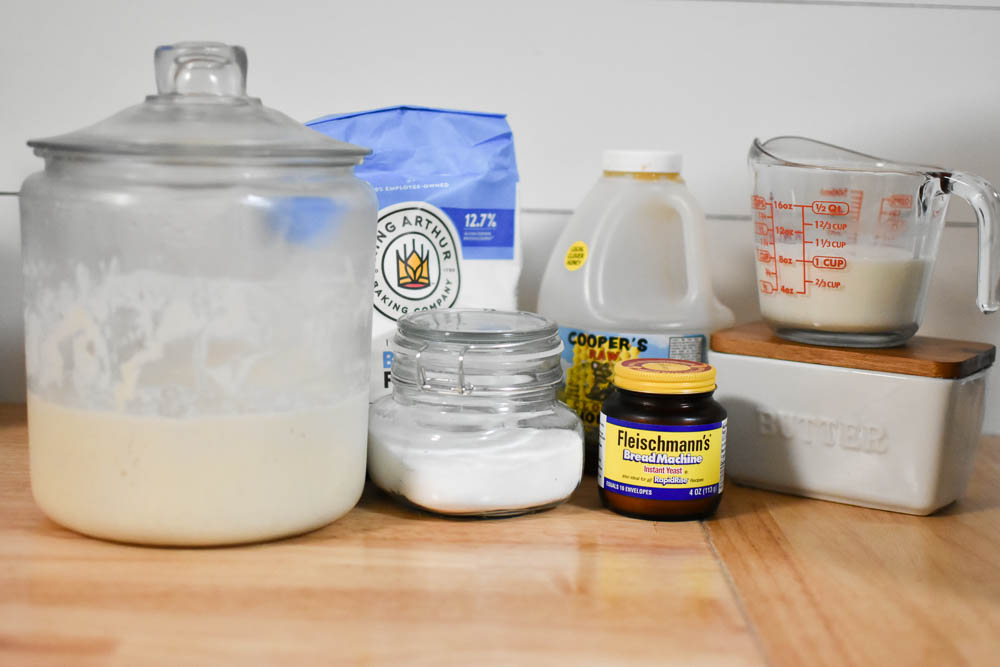
- 1 scant cup (225 grams) warm milk (about 1 cup minus 2 tablespoons)
- 3 tablespoons honey
- 1 teaspoon instant yeast (optional, depending on your sourdough starter)
- 1/2 cup (150 grams) sourdough starter (ripe or even discard works!)
- 3 cups plus 2 tablespoons (400 grams) bread flour (use an additional 1/4 cup for all-purpose flour, totaling 425 grams)
- 1 teaspoon sea salt
- 2 tablespoons very soft butter, cut into pieces
- 1 tablespoon melted butter, for brushing the baked loaf
Instructions
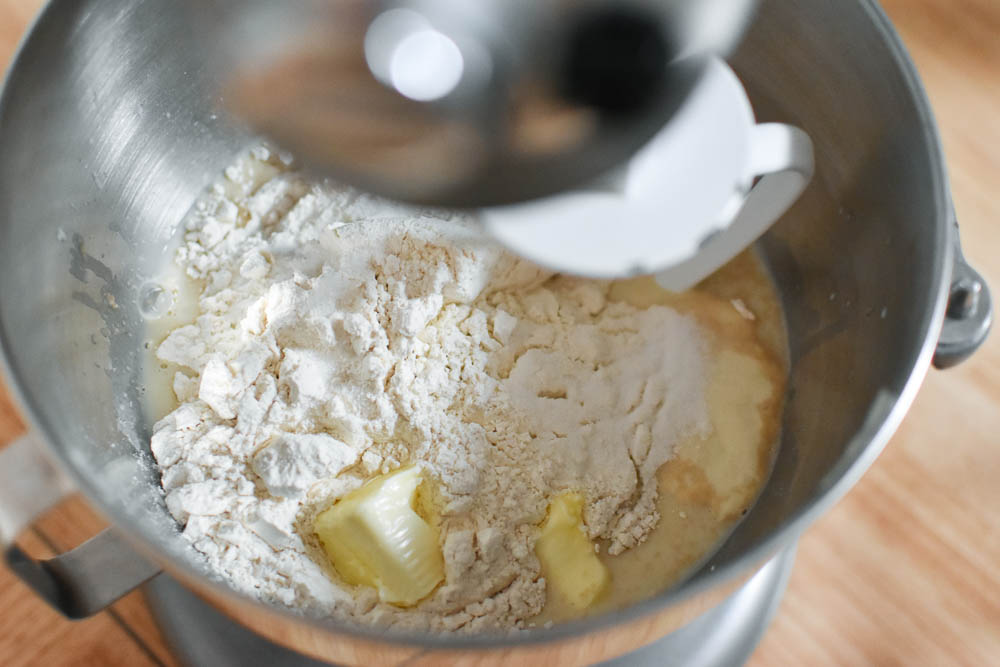
- Combine the Wet Ingredients: Begin by pouring the warm milk into the bowl of a stand mixer fitted with a dough hook. Add honey and stir until it’s completely dissolved. If you’re using instant yeast, add it here along with the sourdough starter for the soft sourdough sandwich bread, mixing to combine.
- Mix in the Dry Ingredients: Gradually add the flour and sea salt to the wet ingredients. Mix on medium-low speed until the dough begins to come together. You want a cohesive mixture that isn’t too sticky for a soft sourdough sandwich bread.
- Incorporate the Butter: With the mixer still on low speed, add the soft butter pieces one at a time, ensuring each piece is fully incorporated before adding the next. Once all the butter has been added, increase the speed to medium and knead the dough for about 5 minutes. This step is crucial for developing gluten, which gives bread its structure.
- First Rise: After kneading, transfer the dough to a large, lightly oiled bowl. Cover it with oiled plastic wrap and let it rise until it’s nearly doubled in size. This should take around 2 hours if you’ve added the optional yeast. If you’re relying solely on your sourdough starter, be prepared for a longer rise of 12-18 hours, which results in a more complex flavor profile for the soft sourdough sandwich bread.
- Shape the Dough: Once the dough has risen, turn it out onto a clean countertop. Gently stretch it several times to further develop the gluten. Then, roll it tightly into a loaf shape, pinching the seams together to seal. Place the shaped loaf into an oiled loaf pan and cover it again with oiled plastic wrap. Allow it to rise a second time, about 1 hour, or until it rises about an inch above the rim of the pan. This step will take longer if you’re not using any additional yeast.
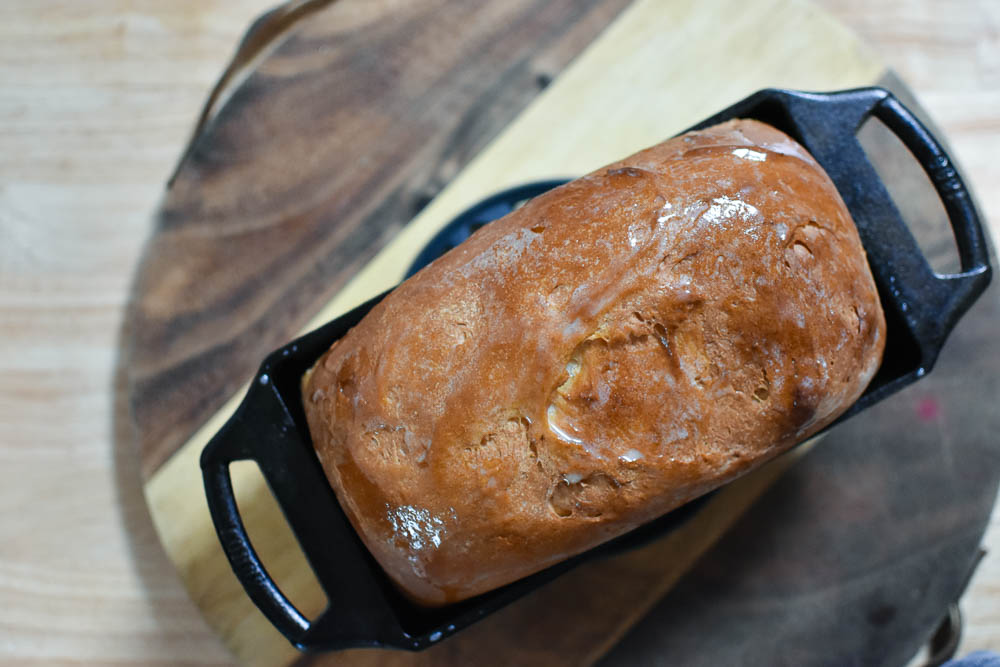
- Preheat and Bake: Preheat your oven to 350°F (175°C). Once the loaf has risen, bake it in the preheated oven for about 35 minutes. You’ll know it’s done when the top is golden brown and the internal temperature reads between 190°F and 200°F on an instant-read thermometer.
- Finish and Cool: As soon as the loaf comes out of the oven, brush the top with melted butter. This step is essential for achieving that soft, delectable crust. Allow the loaf to cool completely before slicing and enjoying your soft sourdough sandwich bread.

Soft sourdough sandwich bread
Ingredients
- 1 scant cup 225 grams warm milk (about 1 cup minus 2 tablespoons)
- 3 tablespoons honey
- 1 teaspoon instant yeast optional, depending on your sourdough starter
- 1/2 cup 150 grams sourdough starter (ripe or even discard works!)
- 3 cups plus 2 tablespoons 400 grams bread flour (use an additional 1/4 cup for all-purpose flour, totaling 425 grams)
- 1 teaspoon sea salt
- 2 tablespoons very soft butter cut into pieces
- 1 tablespoon melted butter for brushing the baked loaf
Instructions
- Combine the Wet Ingredients: Begin by pouring the warm milk into the bowl of a stand mixer fitted with a dough hook. Add honey and stir until it’s completely dissolved. If you’re using instant yeast, add it here along with the sourdough starter, mixing to combine.
- Mix in the Dry Ingredients: Gradually add the flour and sea salt to the wet ingredients. Mix on medium-low speed until the dough begins to come together. You want a cohesive mixture that isn’t too sticky.
- Incorporate the Butter: With the mixer still on low speed, add the soft butter pieces one at a time, ensuring each piece is fully incorporated before adding the next. Once all the butter has been added, increase the speed to medium and knead the dough for about 5 minutes. This step is crucial for developing gluten, which gives bread its structure.
- First Rise: After kneading, transfer the dough to a large, lightly oiled bowl. Cover it with oiled plastic wrap and let it rise until it’s nearly doubled in size. This should take around 2 hours if you’ve added the optional yeast. If you’re relying solely on your sourdough starter, be prepared for a longer rise of 12-18 hours, which results in a more complex flavor profile.
- Shape the Dough: Once the dough has risen, turn it out onto a clean countertop. Gently stretch it several times to further develop the gluten. Then, roll it tightly into a loaf shape, pinching the seams together to seal. Place the shaped loaf into an oiled loaf pan and cover it again with oiled plastic wrap. Allow it to rise a second time, about 1 hour, or until it rises about an inch above the rim of the pan. This step will take longer if you’re not using any additional yeast.
- Preheat and Bake: Preheat your oven to 350°F (175°C). Once the loaf has risen, bake it in the preheated oven for about 35 minutes. You’ll know it’s done when the top is golden brown and the internal temperature reads between 190°F and 200°F on an instant-read thermometer.
- Finish and Cool: As soon as the loaf comes out of the oven, brush the top with melted butter. This step is essential for achieving that soft, delectable crust. Allow the loaf to cool.