The Ultimate Creamy Mac and Cheese Recipe That Will Change Your Life
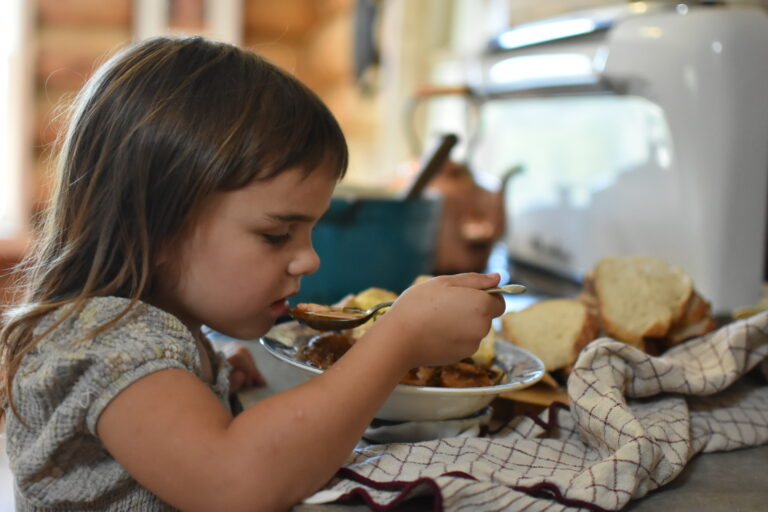
This isn’t just any mac and cheese – it’s the creamy, dreamy comfort food masterpiece your family will beg you to make again and again. Perfect for feeding hungry kids with plenty left over for lunch boxes, and guaranteed to be the star of any birthday party or family gathering. With a perfectly smooth cheese sauce and the ideal pasta-to-cheese ratio, this homemade mac and cheese puts boxed versions to shame.

Why This Mac and Cheese Recipe Works
After testing dozens of variations, I’ve discovered the secret to perfect mac and cheese: using the highest quality ingredients you can find, especially raw grass-fed organic cheddar cheese, plus the ideal ratio of milk to cream. The result? A velvety smooth cheese sauce that clings to every piece of pasta without being gloopy or greasy.
When you use organic pasta and grass-fed dairy, you’re not just making a healthier choice – you’re creating a noticeably more delicious dish. The clean flavors shine through, and the natural richness of grass-fed products creates that golden color and luxurious mouthfeel that makes this mac and cheese truly special.
This recipe serves 8-10 people generously, making it perfect for feeding the whole family with plenty left over for tomorrow’s lunch boxes. It’s also my go-to dish for birthday parties, potlucks, and family gatherings – kids and adults always ask for seconds! The best part? It comes together in under an hour and finishes with a gorgeous golden, crusty cheese top that everyone will fight over.
Ingredients
For the Perfect Mac and Cheese:
- 1 lb. dried elbow pasta (organic pasta recommended)
- 1/2 cup unsalted butter (grass-fed butter for richer taste)
- 1/2 cup all-purpose flour (organic unbleached flour preferred)
- 1 1/2 cups whole milk (organic, grass-fed for creamiest results)
- 2 1/2 cups half and half (organic, grass-fed – see pro tip below)
- 6 cups shredded medium cheddar cheese, divided (raw grass-fed organic cheddar – measure after shredding)
- 1/2 tablespoon salt (sea salt or himalayan pink salt to taste)
- 1/2 teaspoon freshly ground black pepper
- 1/4 teaspoon paprika (organic smoked paprika adds incredible depth!)

Step-by-Step Instructions
Prep Your Ingredients (5 minutes)
- Shred your cheese fresh – Pre-shredded cheese contains anti-caking agents that prevent smooth melting. Trust me on this one!
- Choose quality ingredients – Using organic pasta and raw grass-fed cheese makes a noticeable difference in both flavor and nutrition. The cheese will melt more smoothly and taste significantly richer.
- Measure everything out – This recipe moves quickly once you start, so having everything ready makes the process seamless.
Cook the Pasta (8-10 minutes)
- Bring a large pot of salted water to boil. Use about 1 tablespoon of salt – the water should taste like the ocean.
- Cook elbow pasta according to package directions until just shy of al dente (it will finish cooking in the cheese sauce).
- Reserve 1 cup pasta water before draining – this starchy liquid is gold for adjusting sauce consistency.
- Drain pasta and set aside.

Make the Cheese Sauce (15 minutes)
- Create your roux: In your large cast iron pot over medium heat, melt butter. Whisk in flour and cook for 2-3 minutes, stirring constantly. This removes the raw flour taste and creates the base for your silky sauce.
- Add liquids gradually: Slowly whisk in milk and half-and-half. Start with just a splash, whisking vigorously to prevent lumps, then gradually add the rest. This technique ensures a perfectly smooth sauce.
- Simmer until thickened: Bring mixture to a gentle simmer, whisking frequently. Important: Do not let it boil! A rolling boil will create a grainy texture. Cook for 3-4 minutes at a gentle simmer until it coats the back of a spoon.
- Season the base: Add salt, pepper, and paprika. Taste and adjust – this is your chance to build flavor before adding cheese.
- Add cheese in batches: Remove from heat completely before adding cheese. Add cheese in three additions, whisking until completely melted between each addition. Start with 4 cups cheddar, saving the rest for later. Never add cheese while the sauce is still simmering!

Bring It All Together (5 minutes)
- Preheat your oven to 375°F while you finish the mac and cheese.
- Combine pasta and sauce: Add the drained pasta to the cheese sauce and gently fold until every piece is coated.
- Add most of the remaining cheese: Fold in 1½ cups of the remaining cheddar, reserving ½ cup for the top. If the sauce seems too thick, add reserved pasta water a splash at a time.
- Taste and adjust: Add more salt, pepper, or paprika as needed.
Bake for the Perfect Golden Top (20 minutes)
- Top with remaining cheese: Sprinkle the reserved ½ cup of cheddar evenly over the top of the mac and cheese right in your cast iron pot.
- Bake until golden: Transfer the cast iron pot directly to the oven and bake for 20 minutes, or until the top is golden brown and bubbly around the edges. The cheese on top should form a beautiful crusty layer.
- Rest before serving: Let it cool for 5 minutes before serving – this helps it set up perfectly and allows the cast iron to cool slightly for safe handling.

Pro Tips for Mac and Cheese Success
Ingredient Quality Makes All the Difference:
Cheese Selection: Raw grass-fed organic cheddar cheese is worth the investment! It melts more smoothly than processed cheese and has a deeper, more complex flavor. The enzymes in raw cheese create that perfect creamy texture we’re after. If raw cheese isn’t available, seek out the highest quality organic grass-fed cheddar you can find.
Organic Pasta: Organic pasta is free from pesticides that can not be washed off wheat.
Grass-Fed Dairy: Grass-fed butter and dairy products contain more beneficial nutrients and have a naturally richer, more golden color that makes your mac and cheese look as amazing as it tastes.
Cast Iron Benefits: Using a large cast iron pot for this recipe is perfect! The heavy bottom prevents scorching while making the roux, and cast iron retains heat beautifully for even baking. Plus, you get to go straight from stovetop to oven in the same pot.

Temperature Control: Keep heat at medium or lower throughout the entire process. Once you add the dairy, never let the sauce come to a rolling boil – this will cause the proteins to seize up and create a grainy, broken texture. A gentle simmer is all you need for the perfect smooth sauce.
Dairy Substitution: You can replace the half-and-half with equal parts heavy cream and whole milk if that’s what you have on hand.
Make It Your Own: Try adding crispy bacon bits, caramelized onions, or a breadcrumb topping for extra texture and flavor.
Budget-Friendly Substitutions: While organic and grass-fed ingredients create the ultimate mac and cheese, you can still make an incredible dish with conventional ingredients. The technique remains the same!
Storage and Reheating
Next Day Lunches: This mac and cheese is amazing the next day! Pack it in lunch containers while still slightly warm – it reheats beautifully in the microwave. My kids actually prefer the leftovers sometimes because the flavors have had time to meld together.
Refrigerator: Store leftover mac and cheese in the fridge for up to 4 days in an airtight container. Perfect for quick school lunches or after-school snacks.
Reheating: For stovetop reheating, add a splash of milk and reheat gently over low heat, stirring frequently. For lunch boxes, microwave individual portions for 30-60 seconds, stirring halfway through.
Freezing: This recipe freezes well for up to 3 months. Thaw overnight in the refrigerator before reheating – perfect for meal planning ahead of busy weeks.
Perfect for Parties and Events
Birthday Party Hit: This mac and cheese has saved me at countless birthday parties! Kids love it, parents approve of the quality ingredients, and it’s easy to serve a crowd. I usually make a double batch for parties – trust me, you’ll need it.
Make-Ahead Friendly: You can assemble this completely the night before a party. Just cover tightly and refrigerate, then bake when you’re ready to serve. Add 5-10 extra minutes to the baking time if starting from cold.
Serving Tips: Use small paper boats or compartment plates for parties to make serving easier. For events, keep it warm in a slow cooker on the “warm” setting after baking.
Variations to Try
Extra Crispy Top: For an even crustier top, sprinkle some panko breadcrumbs mixed with a little melted butter over the cheese before baking.
Truffle Mac: Add a drizzle of truffle oil just before serving for an elegant twist.
Spicy Kick: Add a pinch of cayenne pepper or some diced jalapeños to the cheese sauce.
Protein Boost: Fold in rotisserie chicken, crispy pancetta, or cooked ground turkey for a heartier meal.
Nutritional Information
Serves 8-10
- Prep Time: 15 minutes
- Cook Time: 40 minutes (20 min stovetop + 20 min baking)
- Total Time: 55 minutes
- Difficulty: Easy

The Ultimate Creamy Mac and Cheese Recipe That Will Change Your Life
Ingredients
- 1 lb. dried elbow pasta organic pasta recommended
- 1/2 cup unsalted butter grass-fed butter for richer taste
- 1/2 cup all-purpose flour organic unbleached flour preferred
- 1 1/2 cups whole milk organic, grass-fed for creamiest results
- 2 1/2 cups half and half organic, grass-fed – see pro tip below
- 6 cups shredded medium cheddar cheese divided (raw grass-fed organic cheddar – measure after shredding)
- 1/2 tablespoon salt sea salt or himalayan pink salt to taste
- 1/2 teaspoon freshly ground black pepper
- 1/4 teaspoon paprika organic smoked paprika adds incredible depth!
Instructions
Prep Your Ingredients (5 minutes)
- Shred your cheese fresh – Pre-shredded cheese contains anti-caking agents that prevent smooth melting. Trust me on this one!
- Choose quality ingredients – Using organic pasta and raw grass-fed cheese makes a noticeable difference in both flavor and nutrition. The cheese will melt more smoothly and taste significantly richer.
- Measure everything out – This recipe moves quickly once you start, so having everything ready makes the process seamless.
Cook the Pasta (8-10 minutes)
- Bring a large pot of salted water to boil. Use about 1 tablespoon of salt – the water should taste like the ocean.
- Cook elbow pasta according to package directions until just shy of al dente (it will finish cooking in the cheese sauce).
- Reserve 1 cup pasta water before draining – this starchy liquid is gold for adjusting sauce consistency.
- Drain pasta and set aside.
Make the Cheese Sauce (15 minutes)
- Create your roux: In your large cast iron pot over medium heat, melt butter. Whisk in flour and cook for 2-3 minutes, stirring constantly. This removes the raw flour taste and creates the base for your silky sauce.
- Add liquids gradually: Slowly whisk in milk and half-and-half. Start with just a splash, whisking vigorously to prevent lumps, then gradually add the rest. This technique ensures a perfectly smooth sauce.
- Simmer until thickened: Bring mixture to a gentle simmer, whisking frequently. Important: Do not let it boil! A rolling boil will create a grainy texture. Cook for 3-4 minutes at a gentle simmer until it coats the back of a spoon.
- Season the base: Add salt, pepper, and paprika. Taste and adjust – this is your chance to build flavor before adding cheese.
- Add cheese in batches: Remove from heat completely before adding cheese. Add cheese in three additions, whisking until completely melted between each addition. Start with 4 cups cheddar, saving the rest for later. Never add cheese while the sauce is still simmering!
Bring It All Together (5 minutes)
- Preheat your oven to 375°F while you finish the mac and cheese.
- Combine pasta and sauce: Add the drained pasta to the cheese sauce and gently fold until every piece is coated.
- Add most of the remaining cheese: Fold in 1½ cups of the remaining cheddar, reserving ½ cup for the top. If the sauce seems too thick, add reserved pasta water a splash at a time.
- Taste and adjust: Add more salt, pepper, or paprika as needed.
Bake for the Perfect Golden Top (20 minutes)
- Top with remaining cheese: Sprinkle the reserved ½ cup of cheddar evenly over the top of the mac and cheese right in your cast iron pot.
- Bake until golden: Transfer the cast iron pot directly to the oven and bake for 20 minutes, or until the top is golden brown and bubbly around the edges. The cheese on top should form a beautiful crusty layer.
- Rest before serving: Let it cool for 5 minutes before serving – this helps it set up perfectly and allows the cast iron to cool slightly for safe handling.
This ultimate mac and cheese recipe proves that homemade comfort food doesn’t have to be complicated. With its creamy texture, rich flavor, and foolproof technique, it’s destined to become your go-to recipe for family dinners, lunch prep, birthday parties, and any occasion that calls for pure comfort food bliss. Your kids will love it fresh from the oven, and you’ll love how easy it makes meal planning for the week ahead.
Have you tried this recipe? I’d love to hear how it turned out! Leave a comment below and let me know if your kids preferred it fresh or as leftovers – mine are always divided!